
 First step: Cut out a piece of your fabric that is 8.5" x 13". I have used everything from cotton to polyester taffeta to silk. Even very shifty fabrics can work because of the interfacing. Cut out a piece of interfacing the same size. If you are using heavier cotton fabric you may be able to get away with no interfacing, but even for the bottomweight sateen fabric that I use, I interface with lightweight interfacing. My favorite is Shapeflex woven interfacing. The interfacing used here is a heavyweight fusible.
 Iron it onto the back of your fabric.
 Next, turn over and iron a .5" of fabric on each long side of your fabric.
 At your bottom edge, turn up and iron about .25" or 3/8". I usually just eyeball it, since it's not a measurement that has to be exact. All other measurements should be as exact as possible.
 Turn the fabric up 1 7/8". Yes, that is an odd number, but it's very important for later.
 Now you can begin the accordion folding. Turn the fabric up the opposite way and iron a fold 1 3/4" from the last one.
 Then fold the other way and iron 2.25" from the last.
 Alternate folding the fabric in each direction and use the same measurements of 1.75" and 2.25".
 The very last fold will be at 1.75. Turn it over and this is what it should look like:
 Next, use a coordinating thread to sew across the top of each pocket.
 Topstitching about 1/8" from the edge works great.
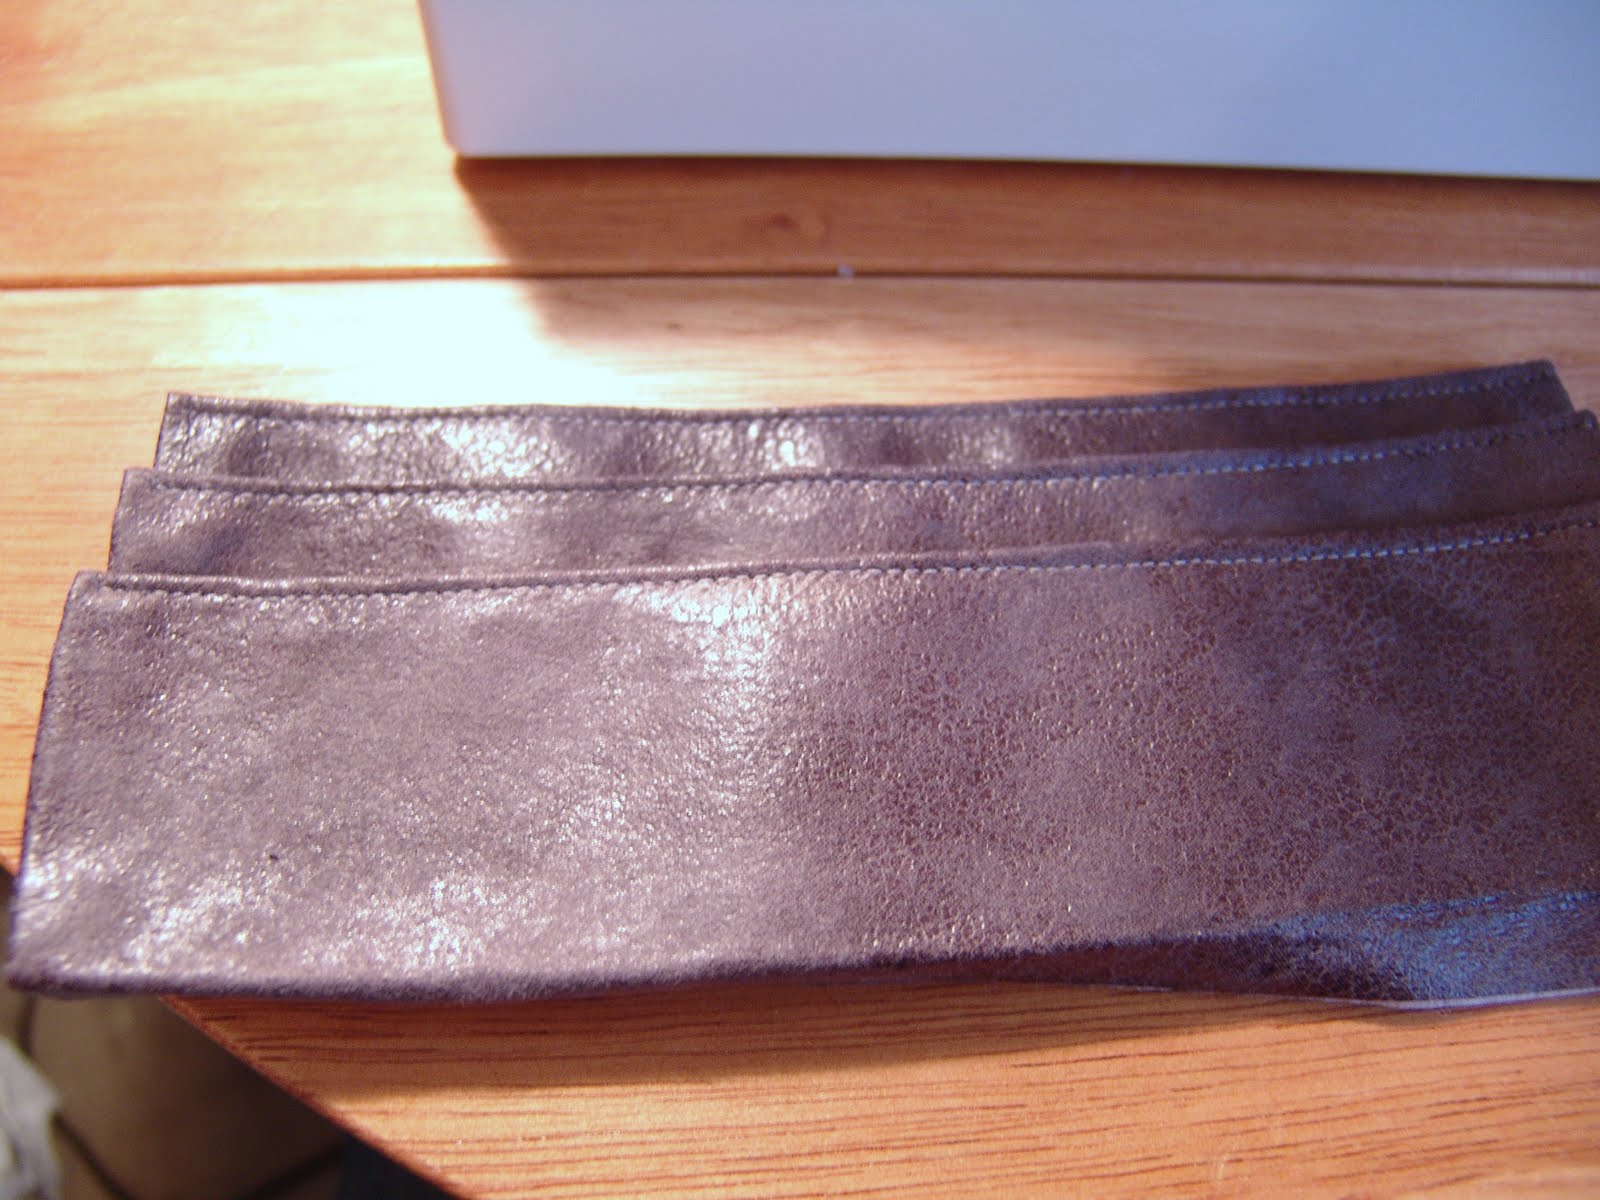 Here is a tricky part. Line up the pockets from the edge and pin the last lip of fabric down, as pictured below. I usually pin it 3" from the edge unless I'm doing a framed clutch, in which case I pin 3.5" from the edge. Sew on top of the last fold.
 Cut off the excess fabric above the stitching.
 Now you will stitch down the line between the pockets. Sew down directly in the middle of the pockets, which should be 3.75" from each edge. This is where precise ironing really makes a difference. Make sure to backstitch at each end to anchor it down really well.
 Now you can sew down the two sides and bottom of the pockets. Sew about 1/8" from the edge. Make sure to backstitch at the beginning and end.
 And here is where you can see the reason we made the first fold 1/8" longer. Because it hangs over, when you stitch it down, there is no chance of the back of the fabric peeking out underneath.
 Be especially careful stitching over the multiple layers. Go slowly. If your needle can't make it through, you may need to switch to a jeans needle. Most fabrics won't be that thick.
 And you have a finished product!
 This fabric was a slippery gray suedecloth--not the best fabric for precision! Cotton and dupioni silk hold folds the best.
 You should test out each pocket and make sure your cards will fit.
This will be one of my new wallet clutches.
I hope that tutorial helped anyone who is hoping to add some card slots to their clutch or wallet.
Thanks for sharing! I don't make many, but I love making purses and wallets. I also like the one I bought from you:)
ReplyDeleteDear I have seen something similar at
ReplyDeletehttp://ssights.webs.com/apps/forums/topics/show/4287553-long-wallet-purse
I discovered your blog internet site on google and check a few of your early posts. Continue to keep up the extremely good operate. I just extra up your RSS feed to my MSN News Reader. Looking for forward to reading much more from you later on!… Slice invitation code
ReplyDelete