Saturday, October 24, 2015

Announcing: StockingsbyToriska!


I'm happy to announce my newest venture: Stockings by Toriska! I've opened a new shop on Etsy devoted to Christmas stockings.

 I have a bunch of ready-to-ship stockings, all in beautiful shades of velvet.  There are four styles of cuff and four styles of toe.
 Also no-cuff styles.
 From Steampunk...
 to Frozen-inspired...
 to the music lover's stocking!
 I offer fifteen shades of velvet.
And a variety of embroidery designs, these are just some examples.

Check out the new shop! I'll be adding new ready-to-ship stockings, and accepting custom orders as well. Now you know why I've been stressed the pat few months! Trying to keep up my purse shop, start selling patterns, and get my holiday shop up and running!

Sunday, October 11, 2015

Boylston Bra review

This weekend I finished up my last open order. I almost never get down to zero open orders on Etsy--there is almost always a bridal order awaiting supplies that keeps me from getting all the way down to zero.  So when I shipped it off, I wasn't quite sure what to do for my Saturday night sewing.  I probably should work on my sewing patterns. I have two I'm working on simultaneously, and the only thing holding me back from sending them to testers is that I am offering them in new sizes, and want to test those new sizes myself first.
 
Anyway, I've been working on bra sewing off and on for awhile.  I recently bought a bunch of elastics and notions and patterns, and then everything has sat in a tote for months.  So I pulled out the pattern I most wanted to make, and sewed it up yesterday and today.
 Isn't it beautiful? This is the Boylston Bra by Orange Lingerie. I have also purchased her Marlborough pattern.  With both of them, I had issues figuring out my size.  I stitched a few muslins up and determined that I needed to go for the largest size (which is not what I have to sew for any other pattern, but hers run small). This pattern is made to work with foam.  So I also sewed foam cups to go inside.  You can see them in the below picture.
There are not instructions on how to do that in the pattern. I found instructions elsewhere.  That's definitely a deficiency in the pattern--why say that this is compatible with foam, but not give instructions?

Oh, the problems I ran into.  First off, there were a couple typos in the pattern that I emailed her about.  The cutting instructions only tell you to cut one of each cup piece.  That's easy enough to figure out--just cut two, mirrored.  One of the pieces is basically a triangle with curved sides.  It is super easy to turn this the wrong way.  So you have to be very careful. I kept the paper pattern piece on top of the fabric pieces so that I could see how the orientation was supposed to be.

I didn't always find the instruction super clear, but since it's just my third bra, I think it's just my unfamiliarity.  I was able to figure everything out, and I think the final product is nice.  Oh, yet another problem--I made this with the size of elastics suggested.  But my straps fit a 2-hook, not a 3-hook like it called for.  I fixed this mostly by aligning the center of the strap elastic with the edge of the fabric, making it a bit wider.

(Update: I emailed the pattern designer about the cutting instructions and strap length, and she will fix the cutting instructions.  The strap length is completely my fault--I had my whole bra cut and sew while the powernet was getting dyed and dried.  When I cut it out, I used the frame piece instead of the band piece.  So the hook and eye issue AND strap issue would have been resolved if I had used the correct piece! **Egg on face**).

The biggest pattern typo was the length of the strap elastic.  It was way too short.  I ended up guessing and made it too long instead.  So I had to make it shorter.  It was still too long. I gave up, because it's never going to fit me.  The cups gape horribly.  I took tucks next to the straps and next to the center.  The straps are at a very weird angle to the cups.  The tuck helped that.  The band is too short for me, even though I added half an inch in length to each band piece.

Sigh.  It's sad to spend all that time on something completely unwearable, but every bra teaches me something new.  Interesting that my very first bra was the only one I've been able to actually wear, but I sewed it while nursing and the cups are too big now.  My next one will be in that pattern again (Pinup Girls Shelley Bra).

Tomorrow I'll be back to my regularly scheduled purse sewing!

Friday, October 2, 2015

Announcing...the Barrelette Clutch!

I'm happy to announce the completion of my first sewing pattern, the Barrelette Clutch!  Named for it's barrel shape, this is one of my first clutch designs, and one that I've adapted into numerous designs over the years.  The pattern has three variations: Basic, Gathered, and Bow. 

Along with the variations, there are instructions for two add-ons, a chain or fabric strap, and a wrist strap.
My fabulous testers were so patient and helpful through my first testing process, and here are some of their versions and feedback!
Gathered version with wrist strap, by Liz Schaffner. "This is a fast, fun clutch for a night out. Whether it be made in silks or denim... It will look fabulous!"

 Basic version by Ana Cristina Machado.
Basic version by Anupama Rao

Two versions, Bow with lace overlay, and Basic with wrist strap, by Bethany Mitchell.

 
Basic, and Basic with Shoulder strap, by Elizabeth Gilmartin. "This pattern provides the perfect base for making a classic barrel style clutch. I love the variations that come with the pattern too (it's like a 3 in 1)!"

Basic version, by Jennifer Lario Moya. "I had a great time seeing my barrelette clutch. As a confident beginner I found it clear and easily to follow. The variations in the pattern are wonderful and so personal. I highly recommend this pattern."
 
Basic version, by Saar Mertens. "The Barrelette is an easy to follow, well-written pattern with great results! The instructions are clear, with diagrams and pictures to guide you through every step. I really enjoyed going through my fabric stash to find the perfect combo for this beautiful clutch. I chose a black fabric, which I embellished with some embroidery and added a vibrant red interior. I couldn't enjoy the finished Barrelette very long, because my best friend claimed it the very same evening to go out on a date!"
Basic version, by Karen Cook.

 
Two Basics with wrist straps, by Kelly Shaw. "Easy pattern to use and great use of pictures too. Love this pattern and easy to use even if you're not used to working with patterns."


Three different Basics, one with a wrist strap, by Lori Peoples. "The Barrelette Clutch is a quick sewing pattern that is very easy to personalize. The possibilities are endless - cross body, wristlet or clutch, plain or embellished, the only limit is your imagination."


Basic, by Tammi Mooney. "Very cute and simple pattern! Quick to make, and you can dress it up or make it simple."
 
Basic version, by Hanie Noor. "This pattern might not be the easiest to sew as a first bag, but you can tell once it's done that it is worth it. The options for making this bag personal are endless. With the right fabrics, it can be as dressy or as casual as you want it to be. A great, roomy clutch!"
 

Basic version, by Anne Verberckmoes.
 
Basic Version, by Rajyalaxmi Pradeep.
 
 
Judi Duncan- "Super cute and fun pattern to make. Instructions are clear and easy to follow and you can sew one up in an afternoon!"
Karen Thomas- "I love this design. The variations mean it will suit anyone. It can be made from any fabric making it easy to compliment your outfit."
And many thanks also to Bec Munro for pattern edits!
The Barrelette (ask me how often I misspell that!) will be available on Etsy and on Craftsy.  Give me a week or so, and I will have interfacing kits ready to sell as well.  I'm combining my PDF patterns with my supply destash shop (formerly ColorSpree), which is now ToriskaPDF.
My next two patterns are actually almost finished. September has really been a whirlwind.  As soon as this pattern goes live I will be finishing them up and asking for testers.  Join my facebook group for more info about those pattern.
 

Tuesday, September 22, 2015

Heel tags

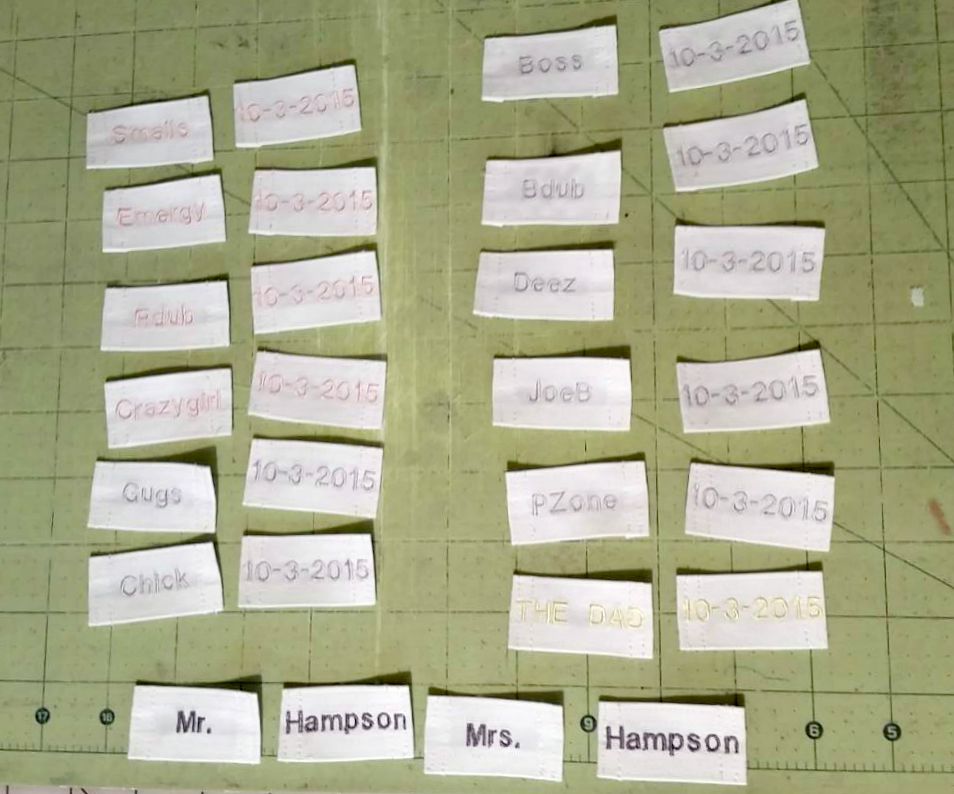
I had an interesting order this week.  This customer wanted custom heel tags to go on the back of her wedding party's Converses.  With bridesmaids, groomsmen, a parent, and the happy couple, it was 14 people, so 28 labels! 
 I wanted to do double topstitching on the edges to match the look of the heel of a Converse, but it was hard to get it straight and consistent from label to label.  Those things were just so small! Eventually I set up an assembly line and topstitching all of my labels like this.  They ended up much better.  I hope the bride sends me a picture!
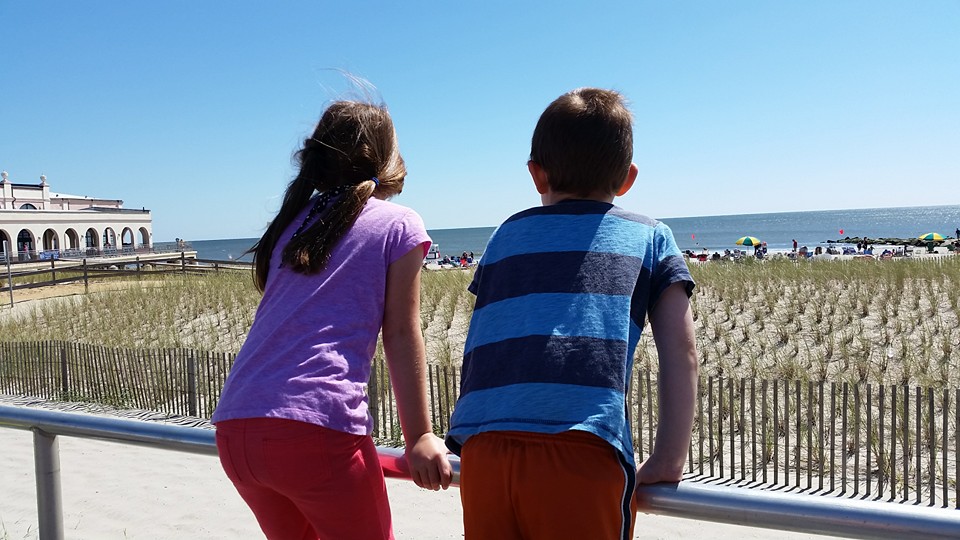
Here's a taste of my personal life.  We had the day off last Monday for Rosh Hashanah and headed to the beach.  The weather was perfect, the toddler and I made sand castles, and the older kids froze in the water with their dad.  Their grandparents came too. A great end to summer!
 I also started a new part-time job.  As someone who has employed herself since college, this has been more nerve-wracking than I expected. But since I am teaching at the school my kids have gone to for three years before this, I know everyone. I've taught two days of music so far and both have gone well.  I redecorated this whole classroom, which before had a bunch of posters with lots of words.  These are preschool kids ages 2-5, so I took everything down, printed and laminated a bunch of pictures of animals with musical instruments, and redecorated!

 My youngest started at the school today.  She loved school and seeing Mommy in music class.
I am finishing up testing on my first clutch pattern!  My testers are giving helpful feedback.  I have the other two framed clutch patterns almost finished, but am waiting on supplies.  I am offering those patterns in new sizes and need to test them myself before sending them to others.

Tuesday, August 18, 2015

New photos and pattern making updates

I have continued to experiment with my new photography equipment.  I finally have come up with something that I like, and I spent last week redoing all my photos in my shop!


I'm very happy with this new style.  I've always wanted to evoke a mood when people come to my shop, and ever since I moved my sewing machine to my photo spot that had the best natural lighting, I have struggled to come up with a new style. I feel like I have finally made it!  I also have been paying more attention to my non-Etsy site lately, and updated the photos there too.

In pattern news, the more research I've done, the more I realize I need to do before I can release my patterns! I'm currently taking an online course on pattern-making and I'm about to make the plunge and purchase some computer software to help me start.  I have no idea how long the actual process will take me.  I had nice ideas of releasing my three most popular clutch designs simultaneously, but that may be too ambitious.  The nice thing is that people are already asking me to be testers. If you are interested, just let me know and I will add you to the list.

Wednesday, July 29, 2015

New color swatches

This weekend I worked on a project I have been wanting to do for awhile.  It involved a lot of photography, editing, and tediousness, but I'm happy to have created a new selection of color swatches!
 
To compare, this is what my swatches looked like before.

 I think the new graphic does a much better job of comparing colors to each other and hopefully is clear.  I found the best results by photographing 4-6 at a time and editing them together before cropping into the correct size.  That way I got the correct colors in relation to other ones. 

In other news, I bought a new photography studio setup.  I bought a little mini backdrop stand, which is awesome, as well as a white backdrop.  I have another backdrop coming in the mail for me to experiment with.  I also bought two softboxes.  I like the light they give off.  It's diffused and easy to change around. I'm still experimenting with light direction.
 Here is an example of a picture with these lights.  I like this one a lot.

Saturday, July 11, 2015

Looking for sewing pattern testers

I have slowly been preparing my patterns for publication, and the first of my patterns is almost ready for testers!  I am just waiting on a scanner so I can scan in the shapes for pattern pieces.  I've already sent this pattern to my first tester, but I had to send her dimensions only, so I'd like to have the scanner before I send it out to other testers.

 This barrel-style clutch with flap is my first pattern. This is my most popular purse and I am happy to offer it as a PDF.
 It can be tricky because you have to sew through several layers of interfacing, including double-sided fusible peltex, the heaviest interfacing.  I use two layers, and that can be finicky.
So if you are interested in being a tester for this clutch, please let me know.  Leave a comment with your email or email me at toriskabags (at) gmail . com
 
I already have written my patterns instructions for three other styles, but I need to take pictures and edit those before offering them.
 Some of my supplies are expensive to buy unless you buy in bulk, so I am willing to send my testers a frame and squares of interfacing to make things easier on them.
 I have never written or sold patterns before, so I'm really hoping to have 5-10 testers for each pattern before I publish them on Etsy.  I'd like testers who have experience in testing patterns and/or sewing purses. Most of my patterns are not suitable for beginners, but are still not too difficult.