
 It's kind of blurry and definitely not the crisp picture that I want. First of all I decided to take pictures on a stack of books so that the camera can't move. I also used the timer to keep my finger from shaking the camera at all. I eventually realized that my ISO was at 100, which was why I had been having such problems with photos being blurry. But with a stack of books, the pictures turned out really clear. I also did some experiment with aperture and found a setting I liked. I figured out White Balance and EV a couple of months ago, so I just kept fiddling with those when necessary. The thing that really baffled me was composition. I didn't want it to just be plain white. I considered using props, and even tried some, but wasn't thrilled with the results. I also tried taking pictures on the tabletop instead of plain white.
 I kind of liked the flowers, but constructive feedback all around was a resounding No! to the flowers.
 I tried plain white, and it looks nice, but still felt like it was missing something.
 This was my final result. I decided to place some sheet music on the bottom for some texture. Then I manipulated the photo a bit in picnik to get the edges like that. I wasn't sure how I felt about it, but my husband and some random people on Etsy seemed to like it, so I decided to change my whole shop. It took a few days, and I still have a few purses to go, plus all the wallets. I'm not sure about the wallets on sheet music, because it's a bit too busy. But other than that, I've changed over my whole shop. Here are some befores and afters for a few of my more blah pictures.
 This moss green has been really hard to photograph, but I think I finally have a picture that shows how pretty it is.
 Changing my aperture and propping the camera up to keep it steady really improved a lot of shots.
 This pink is another really difficult color to photograph, but this new set of pictures works better.
Overall I'm much happier now with how my shop looks! Plus, after staring at that sheet music for hours, I pulled out my violin for the first time since last year's Messiah and gave my family a concert! Much to my surprise, my fingers weren't too rusty, and my kids really enjoyed it.

 Yesterday my in-laws arrived with the new top for my table: a door! It is so much more stable than my 1/2-inch plywood and has smooth edges, yay! The other tabletop was already bent in the middle. This was how I was able to quilt this bedspread. Well, that, and my husband helped me. I really couldn't have done it without him maneuvering the quilt as I sewed. I told him it was his penance for requesting a quilt rather than a duvet/duvet cover, which would have been much easier to sew.


 First step: Cut out a piece of your fabric that is 8.5" x 13". I have used everything from cotton to polyester taffeta to silk. Even very shifty fabrics can work because of the interfacing. Cut out a piece of interfacing the same size. If you are using heavier cotton fabric you may be able to get away with no interfacing, but even for the bottomweight sateen fabric that I use, I interface with lightweight interfacing. My favorite is Shapeflex woven interfacing. The interfacing used here is a heavyweight fusible.




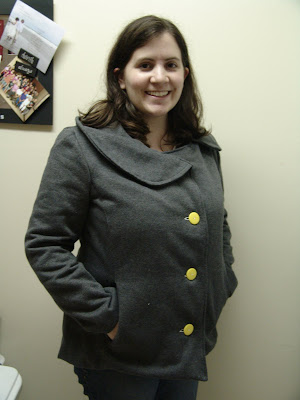 Looking at these pictures, I probably need to move each button up a little bit.

 This view makes it look rather sleek and nice, but I found that it just didn't have the feeling I was going for. I made the next one have a little more shape and several pockets.

 I thought that the gold fabric covering the bust is just fantastic. I mimicked that same effect with gathered gold lame on this black velvet handbag:


 I had two baby showers to attend in one week so I saved time by making the same gift for each baby: a mini soft color book and a small blanket for each. For the blue one I tried out the faux chenille technique for the first time.


